Using a headless content management system (CMS) with Nacelle makes it easy to create, edit, and manage your eCommerce webstore and the presentation layer of your progressive web app (PWA).
Whether you want to swap out the featured image on your homepage, add a post to your blog, or simply adjust the color of a call-to-action button, all of these elements can be changed from the comfort of a CMS dashboard.
In this post, we'll go step-by-step to discover just how simple and elegant it is to change the content of a Nacelle-powered demo store using one of the leading CMS tools, Contentful.
Why Contentful?
The CMS ecosystem has been flourishing the past few years. By easing the pain of changing a site's content, modern CMS solutions help maximize headless builds and kindle enthusiasm for Jamstack.
In turn, this movement increased the appetite for a good CMS tool. And as a result, a dizzying array of headless CMS offerings came onto the scene. And while there are many great choices out there, today’s blog will focus on Contentful, the first CMS to tightly integrate with Nacelle, though we now have connectors for other leading CMS options.
We like that Contentful is easy to use, mostly because of the intuitive what-you-see-is-what-you-get (WYSIWYG) editing experience. The balance of user-friendliness and developer-friendliness make it straightforward for any team member to contribute content, and for developers to connect that content to Javascript-powered frontend components.
With Contentful it’s possible to compose the presentation layer of a Nacelle-powered PWA. Now, let’s talk about how.
Managing the Presentation Layer of Your PWA
We're going to take a fake apparel store, Prairie Wind Apparel, and build a Progressive Web App with Nacelle's Nuxt Starter. We'll use Contentful to control the frontend components of our headless site.
Prairie Wind Apparel's products and collections are managed on Shopify Plus. Everything else—featured images, call-to-action buttons, etc.—will be controlled with Contentful.
Our Stack
Here's a list of all of the platforms we'll be using to create our site:
-
Frontend Framework: Nuxt
-
Product Information Management: Shopify Plus
-
Content Management: Contentful
Arrange Your Headless PWA: First Steps
We're going to use the Nacelle Docs as our guide to get our store set up properly. For brevity's sake, we’re only going to focus on explaining the Contentful setup. After creating a Shopify Plus store with some products and collections, We've used Nacelle's Getting Started docs to take care of all other preliminary steps, including:
-
Creating a Nacelle Account via theNacelle Dashboard
-
Configuring my Shopify Plus store to work with Nacelle
-
Creating a Contentful space and connecting it to Nacelle
-
Configuring all of the routes for pages, collections, etc. as Link Lists in the Nacelle Dashboard
-
Installing the Nacelle Nuxt Starter on a local machine
Setting up Contentful
After creating a Contentful account and a new Contentful space, we can add our content model to Contentful. The content model defines the various types of content we can add, and the traits that are intrinsic to a particular type of content. For instance, the Testimonial content type will be made up of three components: the testimonial author's name, their photo, and the testimonial text.
While you’re free to set up your own content models from scratch, Nacelle offers a boilerplate content model that can help you get started quickly. To use this content model, we’ll follow the instructions in the Nacelle docs. The instructions explain that we need to:
-
Save the content model JSON configuration file
-
Simply right-click and select Save As (Chrome) or Save Page As (Firefox)
-
-
Install the Contentful CLI (don’t forget to log in)
-
Upload the configuration file to your Contentful Space using the space import command
-
NOTE: If the Contentful CLI takes issue with “--content-file argument,” you may need to use the camel-case “--contentFile” form instead
-
Once our content model has been successfully uploaded, we should have a handful of new models in our Contentful space's "Content model" section. Among them, we should see “Page,” “Article,” and “Hero Banner.”
Time to start adding some content! Let's start with the homepage. The Nacelle docs say that to add a homepage, we will need to create a new "page" entry, and then set its handle to "homepage" and its title to “Homepage.”
Let’s do it:
The Nacelle docs also also advise that “entries in Contentful must have a handle in order to be indexed.” If we don’t add a handle to an entry, it won’t exist as a top-level entry in the Nacelle content index. For this reason, we’ll want to make sure that page entries always have a handle.
Sometimes, we don’t want or need an entry to be indexed, so long as it’s contained by another entry that has been indexed. For example, an arbitrary entry without a handle will exist in the Nacelle index if it is used in a Page entry’s sections—we’ll see an example of this below.
Once we've added the handle and title, we can add content to our homepage by creating or linking entries in our page's "sections" field. Let's start by adding a hero banner (be sure to click "publish" when finished):

Let's keep building out our homepage by adding more content to the page's sections field. Following the same steps that we used to add the hero banner, we can add a couple of side-by-side sections, which display text on one side and an image on another.
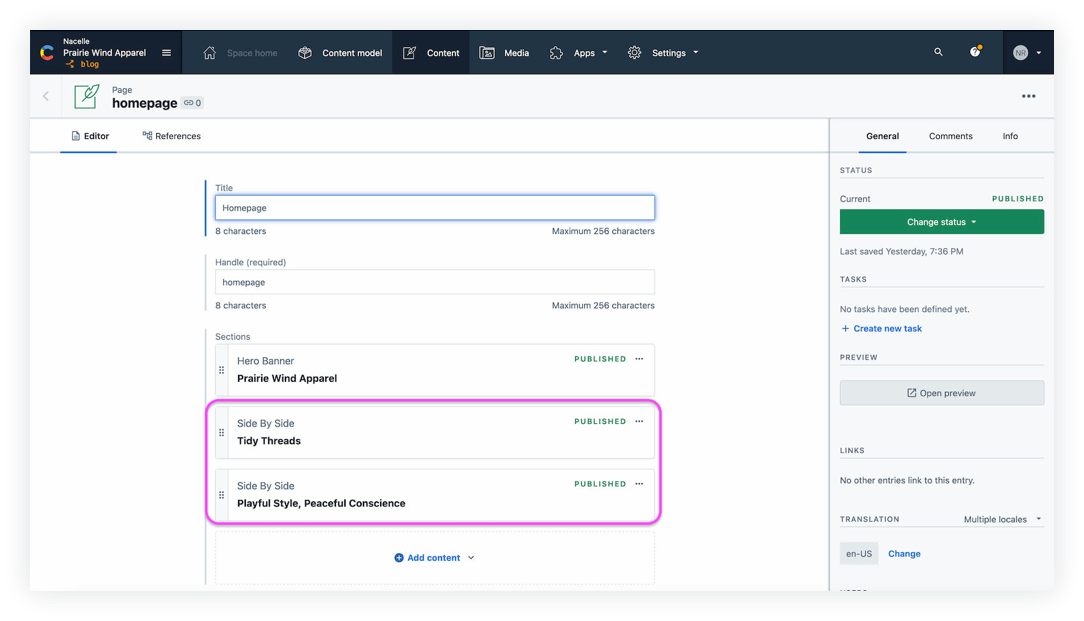
After adding the side-by-sides, let's spin up our PWA to see how it's looking. The Nacelle docs instruct us to ensure that some required environment variables have been added to a .env file in the project root before running. After copying the right values from the “Space Settings” in the Nacelle Dashboard, it's time to start the app with npm run dev.
When I open localhost:3000 to check out the desktop and mobile views, this is what I see:
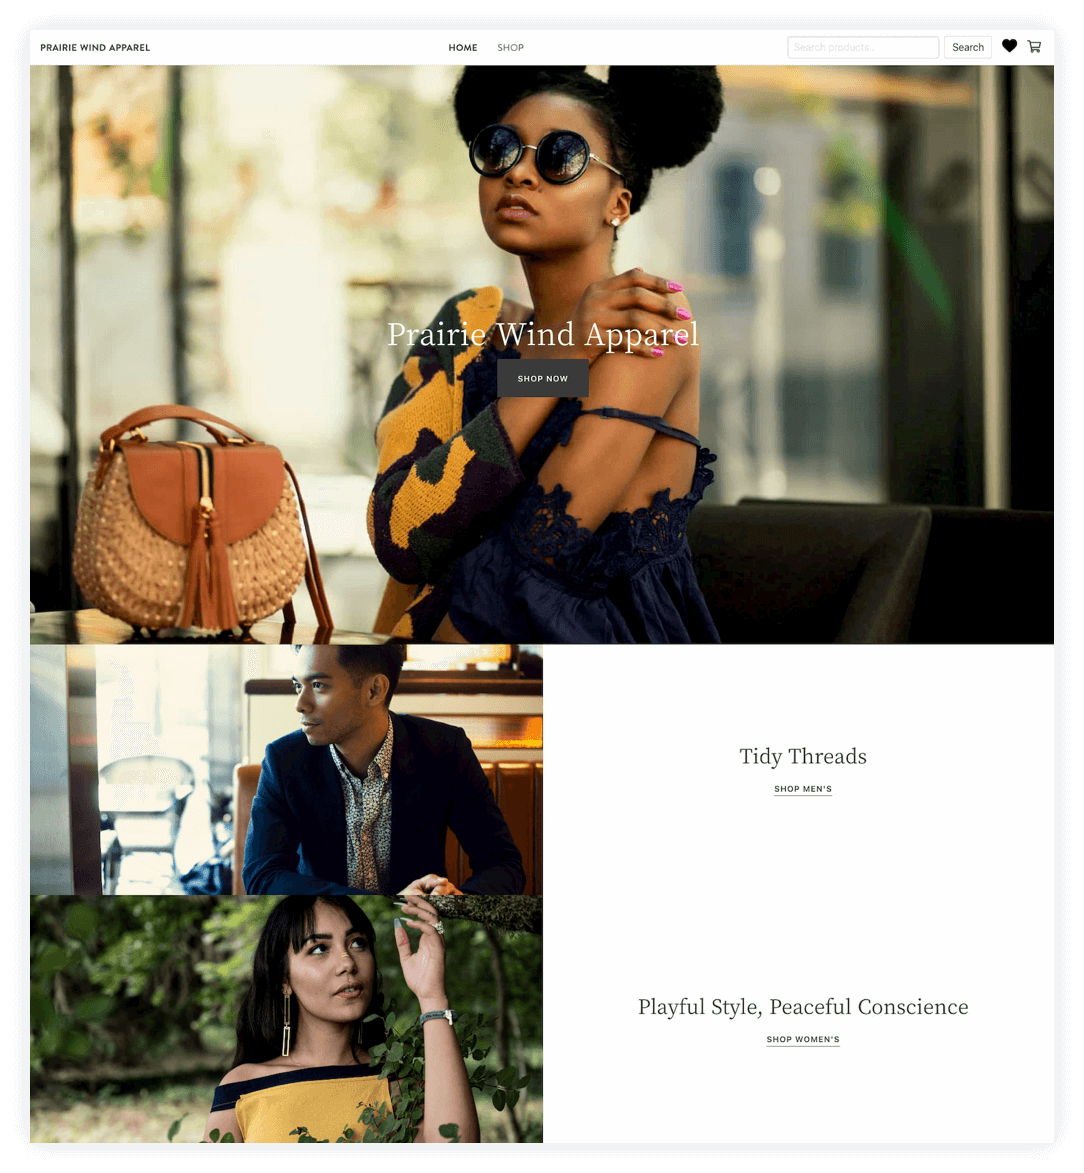
Not bad! Our hero banner and side-by-side sections are present, and have the text and buttons added in Contentful, all without writing one line of code.
But there are still a couple of issues with the layout. In the desktop view, the side-by-sides are both oriented in the same direction. It would be much nicer if they were juxtaposed, and had a touch of color. And for the mobile view, it would be better if we could reverse the images and text in the side-by-sides, so that there’s a consistent alternation of image and text from the hero banner down to the last side-by-side.
Let's take care of that in Contentful. For the first side-by-side, we'll select "Reverse Desktop" and "Reverse Mobile" and add a light orange background. For the second side-by-side, we'll just select "Reverse Mobile" and add a light green background. After publishing those changes, let's restart our Nuxt app and see what if we've achieved the desired effect:
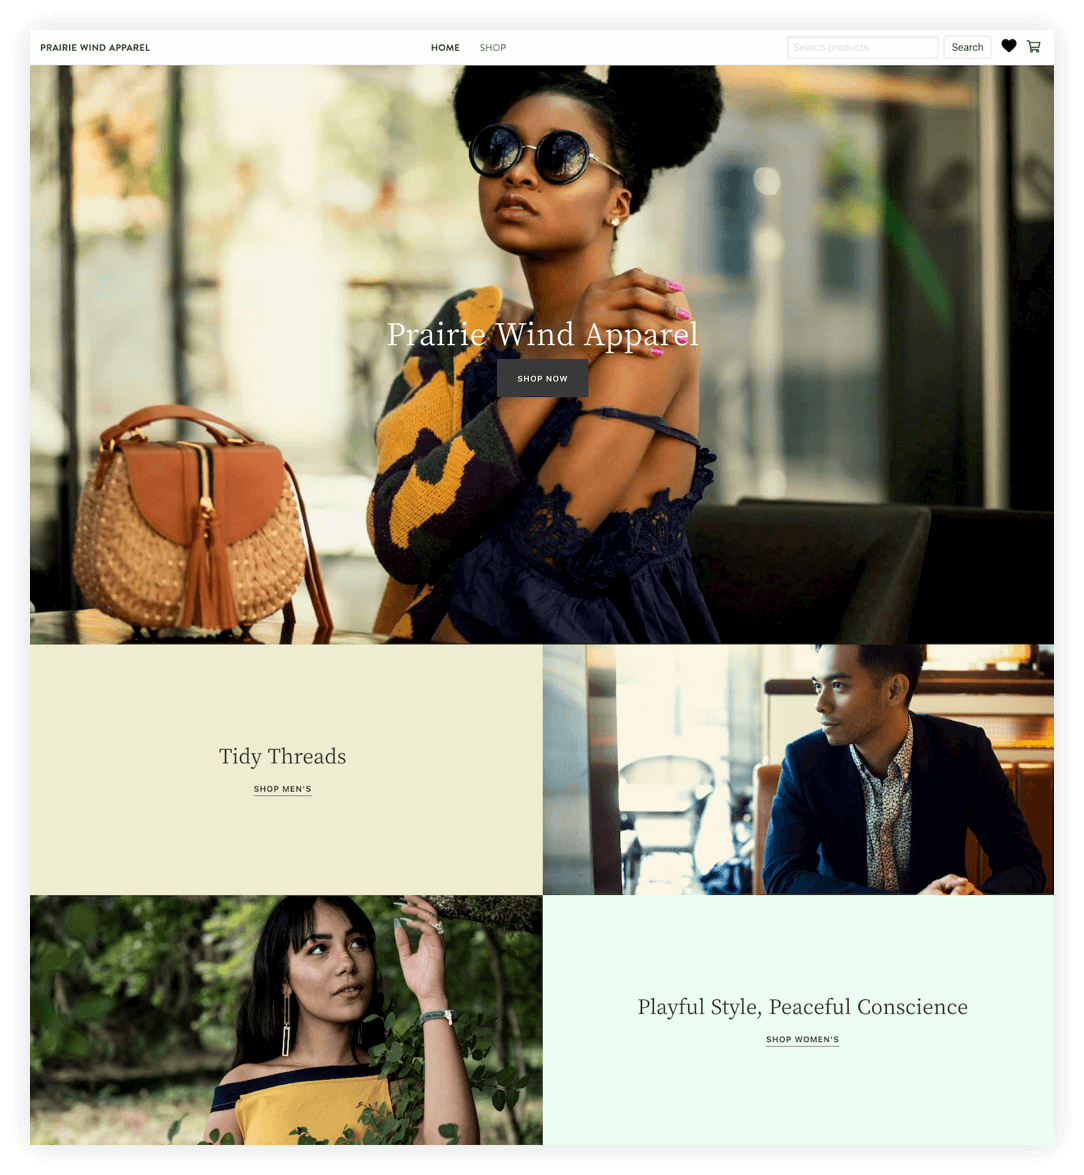
Nice! The side-by-sides look much better, don't they? With just a few clicks, we've transformed the way out homepage looks, and we still haven't touched a line of code.
Dressing up the collection pages on your site
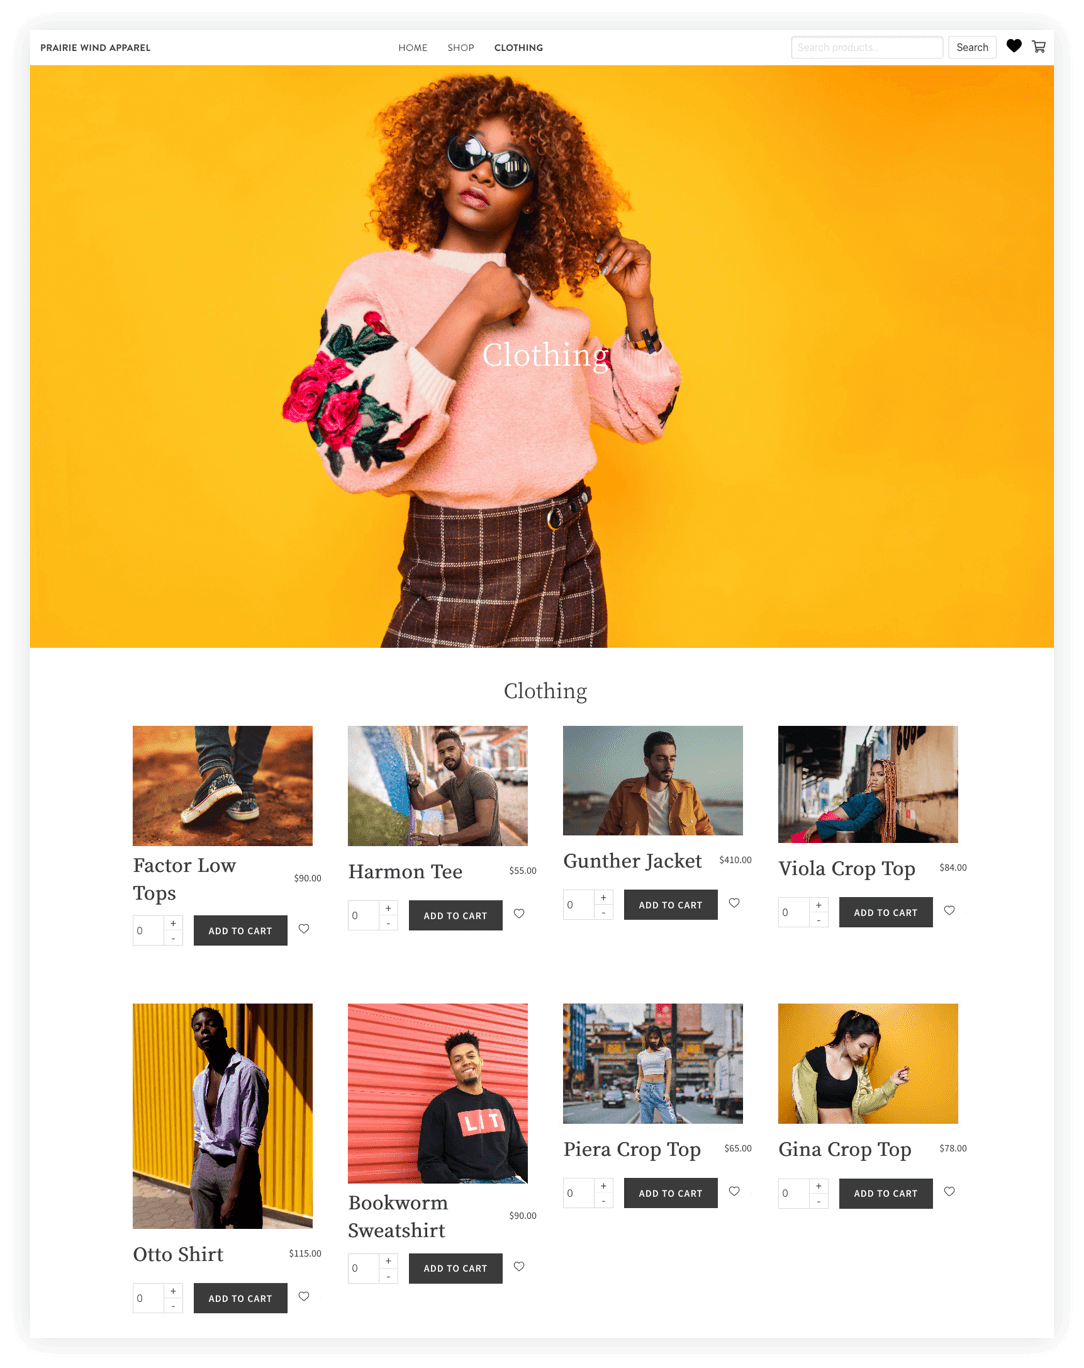
In our Shopify Plus store, there are a handful of product collections. One of them is "clothing." After adding that collection to our navigation menu via our Link List settings in the Nacelle Dashboard, let’s restart our development server and check out the “/collections/clothing” route.
All of the products in our collection are available at the “/collections/clothing” route.
Nice! It's looking a bit bare, though. Let's add a hero banner to this page. We'll have to slightly modify the Vue file associated with this route. No big deal!
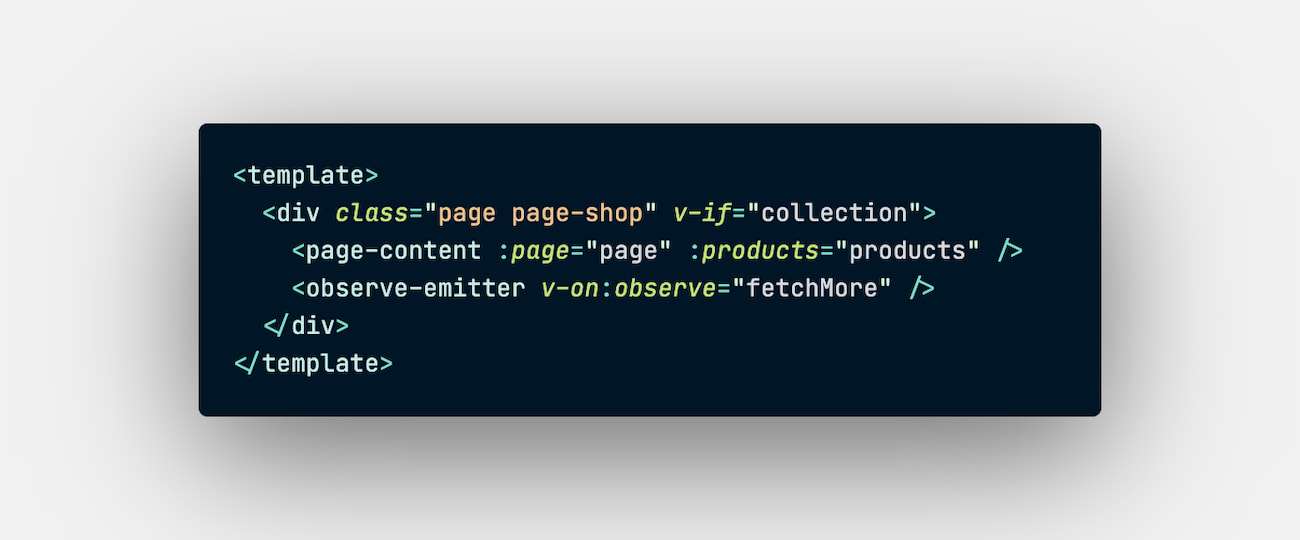
In our Nuxt project, the collections/_collectionHandle.vue file controls the /collections/* routes. The template portion of that file looks like this:
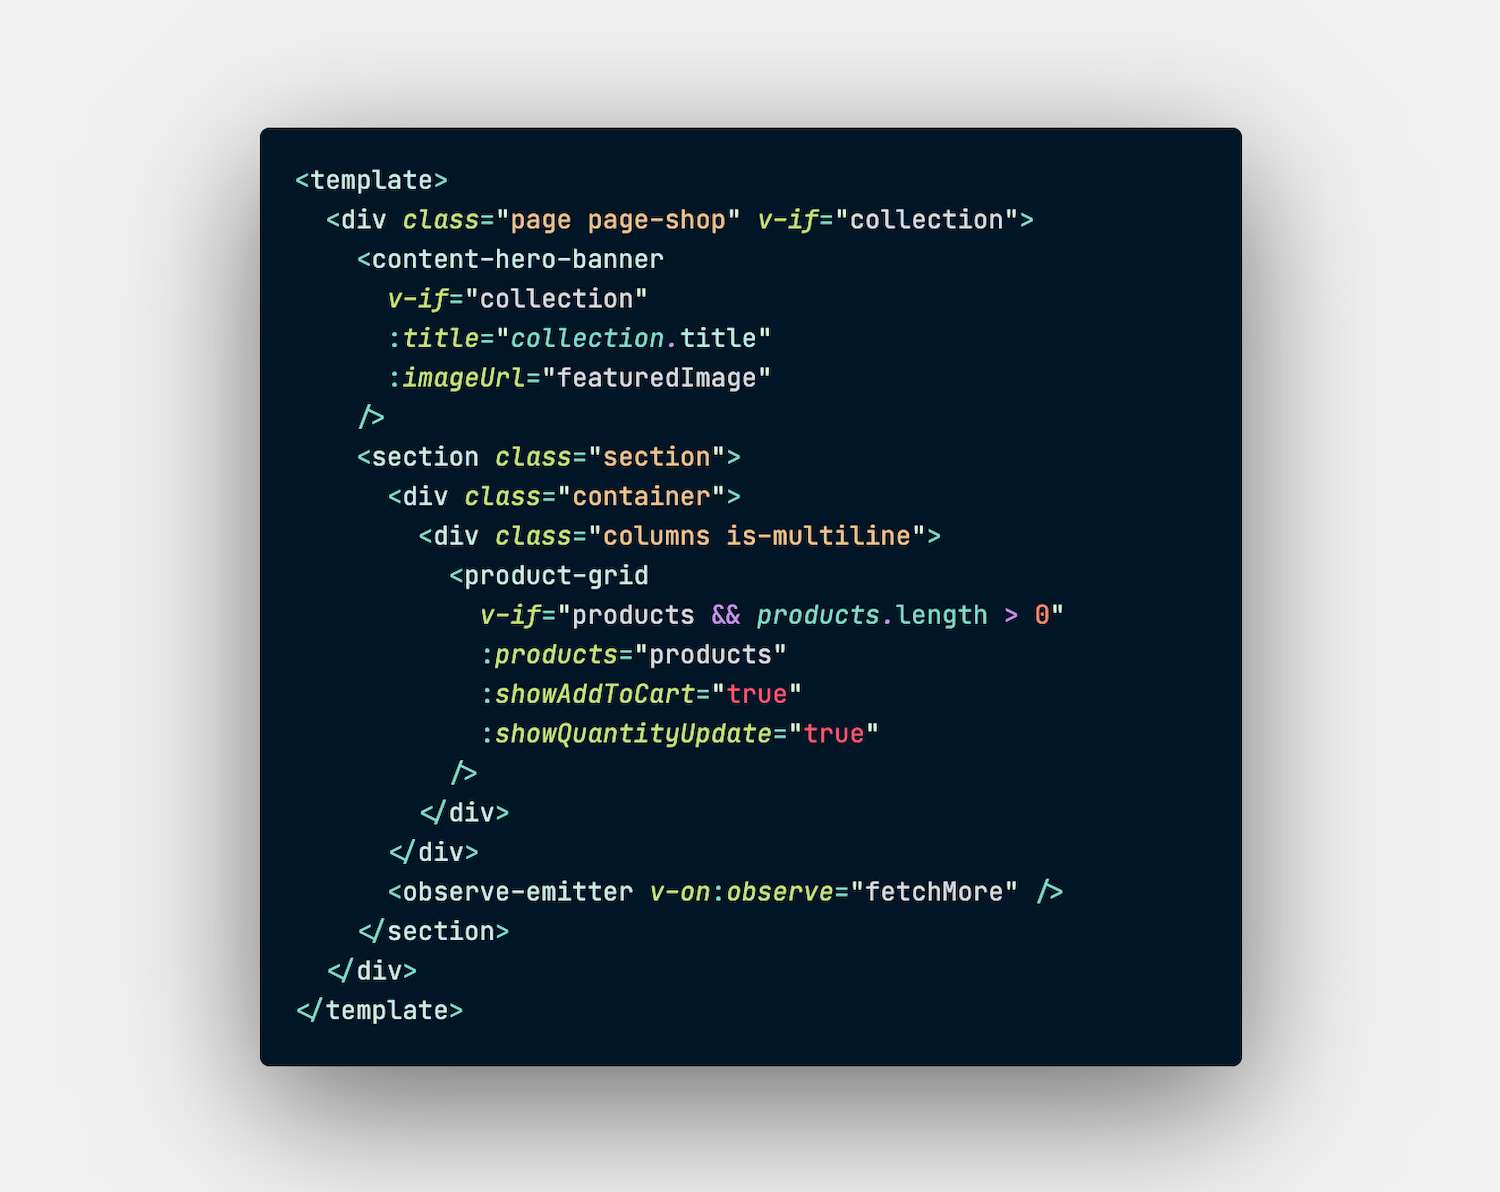
While this code would be perfect if we wanted to manage our hero banner via the featured media of our Shopify collection, let’s take a more CMS-centric approach—we’ll create a new page entry in Contentful with a handle that corresponds to a collection.
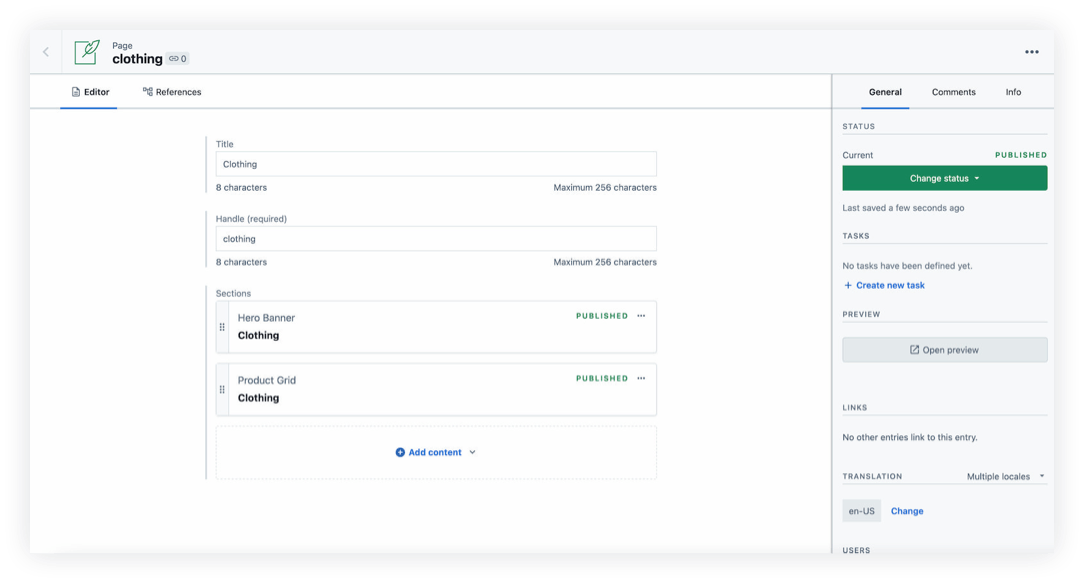
We’ll start by creating a new page with the handle “clothing.” Let’s add to this page’s sections—first, with a hero banner, and next, with a product grid.
The product grid’s content model allows us to select a collection to link to using the Nacelle App for Contentful. We’ll use this to create a product grid from the clothing collection. Once we’ve added those sections, our Page entry for the clothing collection looks like this:
Next, let's modify the <script></script> portion of collections/_collectionHandle.vue (edited below for brevity). We'll start by removing the ContentHeroBanner and ProductGrid components. Next, we’ll create a new piece of data called “page.” We’ll assign data to this.page in the fetch hook with the help of the Nacelle JavaScript SDK:
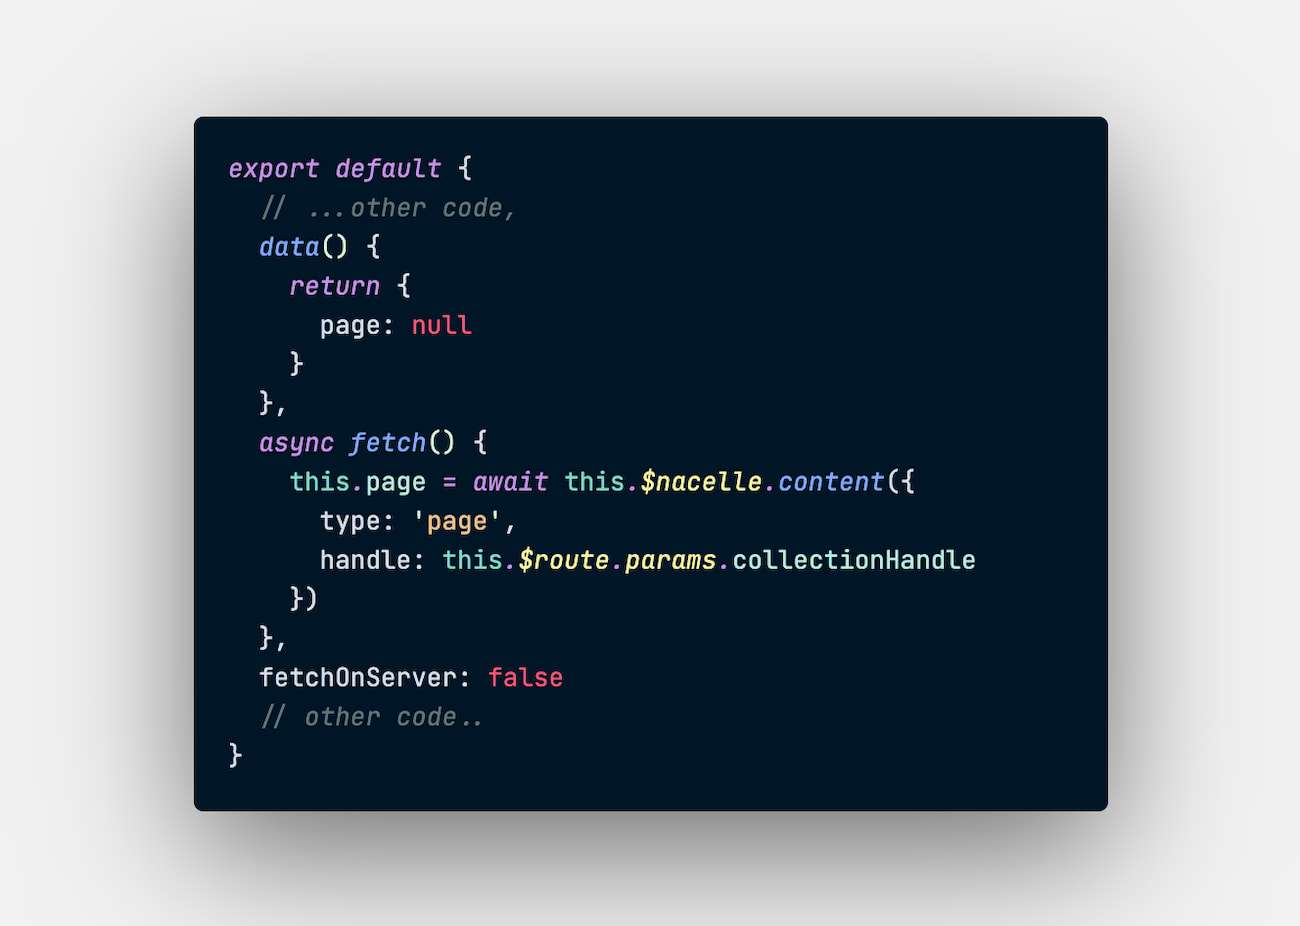
Note that to fetch content with the SDK, we must provide a content type and a handle. We can dynamically set the handle from the route with this.$route.params.collectionHandle. For more details about how route params work, check out the Nuxt docs.
Next, we’ll import and register the PageContent component, which helps us map entries from our CMS into our page via slots. If you’d like to see another example of this PageContent component in action, check out pages/pages/_pageHandle.vue.
Lastly, we'll modify the template portion of our page. We need to remove the <content-hero-banner />, and add replace it with <page-content />:
Once we save our Vue file, let's head back to the “/collections/clothing” route and see what's there.
Success! Our collection page has a hero banner. Now that we've written the code in the collection page template, it's easy to add new collection pages. Just create new page entries in Contentful and add to their sections, taking care to make sure the page handle matches the collection name.
Wrapping up
In this post, we introduced the pattern of managing your PWA's content using Contentful. Along the way, we used approaches to change content and layouts without code. We also used some light code modifications to load new data into a page to make it more appealing.
This is what it's like to build a PWA with Nacelle—you can make structural changes to the look and feel of your eCommerce storefront without any code. And when you need to add some custom functionality, there are building blocks that make it very straightforward to cover a wide variety of data loading needs.
The combination of these approaches help you move quickly with the help of pre-built connections between data and components, while also giving you flexibility when needed.
We hope that you feel emboldened to try using a leading CMS with Nacelle for your next hyper-scalable eCommerce PWA build. If you have questions about this post or Nacelle in general, please get in touch
For more on best-of-breed CMS solutions, >read on.